| New file |
| | |
|---|
| | | baseURL = "/" |
|---|
| | | title = "Compose" |
|---|
| | | enableRobotsTXT = true |
|---|
| | | theme = "compose" |
|---|
| | | enableGitInfo = true |
|---|
| | | |
|---|
| | | disableKinds = ["taxonomy", "taxonomyTerm"] |
|---|
| | | |
|---|
| | | # menu items |
|---|
| | | [[menu.main]] |
|---|
| | | name = "Docs" |
|---|
| | | weight = 2 |
|---|
| | | url = "/docs/" |
|---|
| | | |
|---|
| | | [[menu.main]] |
|---|
| | | name = "Example" |
|---|
| | | weight = 3 |
|---|
| | | url = "/" |
|---|
| | | |
|---|
| | | [[menu.main]] |
|---|
| | | name = "GitHub" |
|---|
| | | icon = "github.svg" |
|---|
| | | weight = 4 |
|---|
| | | url = "https://github.com/onweru/compose/" |
|---|
| | | |
|---|
| | | [markup] |
|---|
| | | [markup.goldmark] |
|---|
| | | [markup.goldmark.renderer] |
|---|
| | | unsafe = true |
|---|
| | | [markup.highlight] |
|---|
| | | codeFences = true |
|---|
| | | guessSyntax = false |
|---|
| | | hl_Lines = "" |
|---|
| | | lineNoStart = 1 |
|---|
| | | lineNos = true |
|---|
| | | lineNumbersInTable = true |
|---|
| | | noClasses = false |
|---|
| | | style = "monokai" |
|---|
| | | tabWidth = 2 |
|---|
| | | |
|---|
| | | # Everything below this are Site Params |
|---|
| | | |
|---|
| | | [params] |
|---|
| | | copyright = "Weru" |
|---|
| | | searchPlaceholder = "Search the docs ..." |
|---|
| | | repo = "https://github.com/onweru/compose" |
|---|
| | | |
|---|
| | | time_format_blog = "Monday, January 02, 2006" |
|---|
| | | time_format_default = "January 2, 2006" |
|---|
| New file |
| | |
|---|
| | | +++ |
|---|
| | | title = "Compose" |
|---|
| | | +++ |
|---|
| | | |
|---|
| | | {{< block "grid-2 mt-2" >}} |
|---|
| | | {{< column >}} |
|---|
| | | |
|---|
| | | # Compose your Docs with __Ease__. |
|---|
| | | |
|---|
| | | Compose is a lean theme for the _Hugo_, inspired by [forestry.io](https://forestry.io). |
|---|
| | | |
|---|
| | | We do a [Pull Request](https://github.com/onweru/compose/pulls) contributions workflow on **GitHub**. Also feel free to raise any issues or feature suggestions. |
|---|
| | | |
|---|
| | | Note that the theme is built with simplicity in mind. This way, if a suggestion complicates the usability of the theme, it may be declined. New users are always welcome! |
|---|
| | | |
|---|
| | | {{< button "/docs/" "Read the Docs" >}} {{< button "https://github.com/onweru/compose" "Download Theme" >}} |
|---|
| | | |
|---|
| | | {{< /column >}} |
|---|
| | | {{< /block >}} |
|---|
| New file |
| | |
|---|
| | | |
|---|
| | | --- |
|---|
| | | title: "Compose Docs" |
|---|
| | | weight: 1 |
|---|
| | | --- |
|---|
| | | |
|---|
| | | Welcome to the Compose theme user guide! This guide shows you how to get started creating technical documentation sites using Compose, including site customization and how to use Compose's blocks and templates. |
|---|
| | | |
|---|
| | | ## What is Compose? |
|---|
| | | |
|---|
| | | Compose is a theme for the [Hugo](https://gohugo.io/) static site generator that's specifically designed for technical |
|---|
| | | documentation sets and has a lot of best practices built in. Use Compose to get a working and reliable documentation |
|---|
| | | site up and running fast, and then get back to focusing on great content for your users. |
|---|
| | | [Learn more about Compose](/about). |
|---|
| | | |
|---|
| | | In addition to the theme itself, we provide an [example site](https://github.com/onweru/compose) that uses lots of Compose features and has a useful skeleton site structure (with advice for what to put in it!) for a large technical documentation set. You can copy the entire site and edit it for your own projects, or just explore the site and its source to see what Compose can do. The site you're currently reading also uses Compose and is a useful example of a smaller Compose docset: feel free to copy it or borrow from it if it suits your needs better than the "big" example. |
|---|
| | | |
|---|
| | | Compose itself does **not** provide: |
|---|
| | | |
|---|
| | | * **Source hosting and management**: Our theme and site source files live on [GitHub](https://github.com/), which is the simplest approach for most projects. However, you can also keep your project files in [GitLab](https://about.gitlab.com/), [BitBucket](https://bitbucket.org/product), locally, or wherever you like. Be aware that where your source files live may affect the Compose features you can use (such as letting users file documentation issues) and site deployment options. |
|---|
| | | * **Site deployment**: You can find out about deployment options in [Previews and Deployment](./deployment/). This site uses [Netlify](https://www.netlify.com/). |
|---|
| | | |
|---|
| | | Compose also doesn't actually generate your site's HTML files: that's Hugo's job! Hugo takes your Markdown or HTML doc source files and Compose's theme files and builds them into a static site for deployment. You can find out more about Hugo and how it works in the [Hugo documentation](https://gohugo.io/documentation/). |
|---|
| | | |
|---|
| | | ## Is Compose for me? |
|---|
| | | |
|---|
| | | Compose is particularly useful for medium to large technical documentation sets with 20+ pages of docs and/or multiple types of docs and pages: tutorials, reference documentation, blog posts, community pages, and so on. |
|---|
| | | |
|---|
| | | If you have a smaller project with only a couple of pages of documentation and hence simpler navigation needs, Compose may be too heavyweight a solution for you. Instead, consider: |
|---|
| | | |
|---|
| | | * A simpler Hugo or Jekyll theme: find out what's available in Github Pages' [built-in Jekyll options](https://pages.github.com/themes/) and the [Hugo theme gallery](https://themes.gohugo.io/). |
|---|
| | | * A good README file that tells users what your project does and links to some examples. |
|---|
| | | |
|---|
| | | If you have a very large documentation project, our example site structure may not be sufficient either, though you can still use our theme, possibly with heavier customization. |
|---|
| | | |
|---|
| | | If you'd like to use Compose's layouts but prefer to use Jekyll, [vsoch](https://github.com/vsoch) has created a [Compose Jekyll port](https://github.com/vsoch/compose-jekyll) that includes many of Compose's features (though as this is a separate project it won't be automatically updated along with Compose). |
|---|
| | | |
|---|
| | | ## Ready to get started? |
|---|
| | | |
|---|
| | | Find out how to build and serve your first site in [Getting Started](./getting-started/). Or visit the [example site](https://example.compose.dev) and [its repo](https://github.com/onweru/compose) and start exploring! |
|---|
| New file |
| | |
|---|
| | | --- |
|---|
| | | title: "Best Practices" |
|---|
| | | weight: 8 |
|---|
| | | description: > |
|---|
| | | Optional guidance and recommendations about organizing, authoring, and managing your technical documentation. |
|---|
| | | --- |
|---|
| | | |
|---|
| | | Use this section to learn about some of the best practices around creating technical documentation with Docsy. |
|---|
| New file |
| | |
|---|
| | | --- |
|---|
| | | title: "Organizing Your Content" |
|---|
| | | weight: 9 |
|---|
| | | description: > |
|---|
| | | Optional guidance and recommendations on how to organize your documentation site. |
|---|
| | | --- |
|---|
| | | |
|---|
| | | If you have a look at our [Example Site](https://example.docsy.dev/about/), you'll see that we've organized |
|---|
| | | the Documentation section into a number of subsections, each with some recommendations about what you might put |
|---|
| | | in that section. |
|---|
| | | |
|---|
| | | ## Do I need to use this structure? |
|---|
| | | |
|---|
| | | Absolutely not! The site structure in the Example Site was created to meet the needs of large docsets for large |
|---|
| | | products with lots of features, potential tasks, and reference elements. For a simpler docset (like this one!), |
|---|
| | | it's fine to just structure your docs around specific features that your users need to know about. Even for larger |
|---|
| | | documentation sets, you may find that the structure isn't useful "as is", or that you don't need to use all the |
|---|
| | | section types. |
|---|
| | | |
|---|
| | | We do recommend that (as we've done here) you provide at least: |
|---|
| | | |
|---|
| | | 1. An **Overview** of the product (either on the docs landing page or a separate Overview page) that tells the user |
|---|
| | | why they should be interested in your project. |
|---|
| | | 2. A **Getting Started** page. |
|---|
| | | 3. Some **Examples**. |
|---|
| | | |
|---|
| | | You may also want to create some tasks/how-tos for your project's features. Feel free to copy this Docsy user guide |
|---|
| | | site or even just the docs section instead if you like this simpler structure better. |
|---|
| | | |
|---|
| | | {{% alert title="Tip" %}} |
|---|
| | | If you want to copy this guide, be aware that its [source files](https://github.com/google/docsy/tree/master/userguide) are *inside* the Docsy theme repo, and so it doesn't have its own `themes/` directory: instead, we run `hugo server --themesDir ../..` to use Docsy from its parent directory. You may want to either copy the site and [add a `themes/` directory with Docsy](/docs/getting-started/#option-2-use-the-docsy-theme-in-your-own-site), or just copy the `docs/` folder into your existing site's content root. |
|---|
| | | {{% /alert %}} |
|---|
| | | |
|---|
| | | [Learn more about how Hugo and Docsy use folders and other files to organize your site](/docs/adding-content/content/#organizing-your-documentation). |
|---|
| | | |
|---|
| | | ## Why this structure? |
|---|
| | | |
|---|
| | | We based the Example Site structure on our own experiences creating (and using) large documentation sets for |
|---|
| | | different types of project and on user research carried out on some of our bigger sites. In user studies we saw that |
|---|
| | | users cared most about and immediately looked for a Get Started or Getting Started section |
|---|
| | | (so they could, well, get started), and some examples to explore and copy, so we made those into prominent top-level doc |
|---|
| | | sections in our site. Users also wanted to find "recipes" that they could easily look up to perform specific tasks and |
|---|
| | | put together to create their own applications or projects, so we suggest that you add this kind of content as Tasks. |
|---|
| | | Other content types such as conceptual docs, reference docs, and end-to-end tutorials are less important for all doc sets, |
|---|
| | | particularly for smaller projects. We emphasize in our Example Site that these sections are optional. |
|---|
| | | |
|---|
| | | We hope to improve the Example Site structure further as we learn more about how users interact with technical |
|---|
| | | documentation, particularly for Open Source projects. |
|---|
| | | |
|---|
| | | ## Writing style guide |
|---|
| | | |
|---|
| | | This guide and the example site just address how to organize your documentation content into pages and sections. For some guidance on how to organize and write the content in each page, we recommend the |
|---|
| | | [Google Developer Documentation Style Guide](https://developers.google.com/style/), particularly the |
|---|
| | | [Style Guide Highlights](https://developers.google.com/style/highlights). |
|---|
| New file |
| | |
|---|
| | | --- |
|---|
| | | title: "Hugo Content Tips" |
|---|
| | | weight: 10 |
|---|
| | | description: > |
|---|
| | | Tips for authoring content for your Compose-themed Hugo site. |
|---|
| | | --- |
|---|
| | | |
|---|
| | | Compose is a theme for the [Hugo](https://gohugo.io/) static site |
|---|
| | | generator. If you're not already familiar with Hugo and, in particular, its version of Markdown, this page provides some |
|---|
| | | useful tips and potential gotchas for adding and editing content for your site. Feel free to add your own! |
|---|
| | | |
|---|
| | | ## Nested lists |
|---|
| | | |
|---|
| | | Hugo currently uses the [Blackfriday](https://github.com/russross/blackfriday) Markdown processor, which can be |
|---|
| | | sensitive when it come to content that's deeply nested in a list. In particular, be aware that |
|---|
| | | [this known issue](https://github.com/russross/blackfriday/issues/329) can surface if or when you have multiple authors and |
|---|
| | | other contributors who might mix 'tabs' and 'spaces' when indenting lists, or fail to indent properly. |
|---|
| | | |
|---|
| | | An additional factor here is that because GitHub uses a different Markdown processor, GitHub markdown and the editor UI may |
|---|
| | | render some nested lists properly, while Blackfriday might render that same content poorly. For example, the count in a |
|---|
| | | numbered list might restart, or your nested content within a list is not indented |
|---|
| | | (shows as a peer element instead of a nested child element). You may want to recommend in your contribution guidelines |
|---|
| | | ([as we do](/docs/contribution-guidelines/#contributing-to-these-docs)) that contributors preview their content with Hugo |
|---|
| | | (or use Netlify's preview feature for PRs if that's your chosen deployment tool) to ensure their content renders correctly |
|---|
| | | with Blackfriday. |
|---|
| | | |
|---|
| | | {{% alert title="Tip" %}} |
|---|
| | | [Per comments on the known issue](https://github.com/russross/blackfriday/issues/329#issuecomment-277602856), some |
|---|
| | | users have found that using 4 spaces instead of a 'tab' results in consistent behavior. For example, consider |
|---|
| | | configuring your local editor to use 4 spaces when the **Tab** key is pressed. |
|---|
| | | {{% /alert %}} |
|---|
| | | |
|---|
| | | ## Linking |
|---|
| | | |
|---|
| | | By default, regular relative URLs in links are left unchanged by Hugo (they're still relative links in your site's generated HTML), hence some hardcoded relative links like `[relative cross-link](../../peer-folder/sub-file.md)` might behave unexpectedly compared to how they work on your local file system. You may find it helpful to use some of Hugo's built-in [link shortcodes](https://gohugo.io/content-management/cross-references/#use-ref-and-relref) to avoid broken links in your generated site. For example a `{< ref "filename.md" >}` link in Hugo will actually |
|---|
| | | find and automatically link to your file named `filename.md`. |
|---|
| | | |
|---|
| | | Note, however, that `ref` and `relref` links don't work with `_index` or `index` files (for example, this site's [content landing page](`/docs/adding-content/`)): you'll need to use regular Markdown links to section landing or other index pages. Specify these links relative to the site's root URL, for example: `/docs/adding-content/`. |
|---|
| | | |
|---|
| | | [Learn more about linking](/docs/adding-content/content/#working-with-links). |
|---|
| New file |
| | |
|---|
| | | --- |
|---|
| | | title: "Customization" |
|---|
| | | weight: 3 |
|---|
| | | description: > |
|---|
| | | How to add content to and customize your Docsy site. |
|---|
| | | --- |
|---|
| | | |
|---|
| | | ## Content root directory |
|---|
| | | |
|---|
| | | You add content for your site under the **content root directory** of your Hugo site project - either `content/` or a [language-specific](/docs/language/) root like `content/en/`. The main exception here is static files that you don't want built into your site: you can find out more about where you add these below in [Adding static content](#adding-static-content). The files in your content root directory are typically grouped in subdirectories corresponding to your site's sections and templates, which we'll look at in [Content sections and templates](#content-sections-and-templates). |
|---|
| | | |
|---|
| | | You can find out more about Hugo directory structure in [Directory Structure Explained](https://gohugo.io/getting-started/directory-structure/#directory-structure-explained). |
|---|
| New file |
| | |
|---|
| | | --- |
|---|
| | | title: "Adding Content" |
|---|
| | | weight: 4 |
|---|
| | | description: > |
|---|
| | | Add different types of content to your Docsy site. |
|---|
| | | --- |
|---|
| | | |
|---|
| | | So you've got a new Hugo website with Docsy, now it's time to add some content! This page tells you how to use the theme to add and structure your site content. |
|---|
| | | |
|---|
| | | ## Content root directory |
|---|
| | | |
|---|
| | | You add content for your site under the **content root directory** of your Hugo site project - either `content/` or a [language-specific](/docs/language/) root like `content/en/`. The main exception here is static files that you don't want built into your site: you can find out more about where you add these below in [Adding static content](#adding-static-content). The files in your content root directory are typically grouped in subdirectories corresponding to your site's sections and templates, which we'll look at in [Content sections and templates](#content-sections-and-templates). |
|---|
| | | |
|---|
| | | You can find out more about Hugo directory structure in [Directory Structure Explained](https://gohugo.io/getting-started/directory-structure/#directory-structure-explained). |
|---|
| | | |
|---|
| | | ### Custom sections |
|---|
| | | |
|---|
| | | If you've copied the example site and *don't* want to use one of the provided content sections, just delete the appropriate content subdirectory. Similarly, if you want to add a top-level section, just add a new subdirectory, though you'll need to specify the layout or content type explicitly in the [frontmatter](#page-frontmatter) of each page if you want to use any existing Docsy template other than the default one. For example, if you create a new directory `content/en/amazing` and want one or more pages in that custom section to use Docsy's `docs` template, you add `layout: docs` to the frontmatter of each page: |
|---|
| | | |
|---|
| | | ```yaml |
|---|
| | | --- |
|---|
| | | title: "My amazing new section" |
|---|
| | | weight: 1 |
|---|
| | | layout: docs |
|---|
| | | description: > |
|---|
| | | A special section with a docs layout. |
|---|
| | | --- |
|---|
| | | ``` |
|---|
| | | |
|---|
| | | Alternatively, create your own page template for your new section in your project's `layouts` directory based on one of the existing templates. |
|---|
| | | |
|---|
| | | You can find out much more about how Hugo page layouts work in [Hugo Templates](https://gohugo.io/templates/). The rest of this page tells you about how to add content and use each of Docsy's templates. |
|---|
| | | |
|---|
| | | ## Page frontmatter |
|---|
| | | |
|---|
| | | Each page file in a Hugo site has metadata frontmatter that tells Hugo about the page. You specify page frontmatter in TOML, YAML, or JSON (our example site and this site use YAML). Use the frontmatter to specify the page title, description, creation date, link title, template, menu weighting, and even any resources such as images used by the page. You can see a complete list of possible page frontmatter in [Front Matter](https://gohugo.io/content-management/front-matter/). |
|---|
| | | |
|---|
| | | For example, here's the frontmatter for this page: |
|---|
| | | |
|---|
| | | ``` |
|---|
| | | --- |
|---|
| | | title: "Adding Content" |
|---|
| | | linkTitle: "Adding Content" |
|---|
| | | weight: 1 |
|---|
| | | description: > |
|---|
| | | How to add content to your Docsy site. |
|---|
| | | --- |
|---|
| | | ``` |
|---|
| | | |
|---|
| | | The minimum frontmatter you need to provide is a title: everything else is up to you! (though if you leave out the page weight your [navigation](/docs/adding-content/navigation) may get a little disorganized). |
|---|
| | | |
|---|
| | | |
|---|
| | | ## Page contents and markup |
|---|
| | | |
|---|
| | | By default you create pages in a Docsy site as simple [Markdown or HTML files](https://gohugo.io/content-management/formats/) with [page frontmatter](#page-frontmatter), as described above. Versions of Hugo before 0.60 use [BlackFriday](https://github.com/russross/blackfriday) as its Markdown parser. From 0.60, Hugo uses [Goldmark](https://github.com/yuin/goldmark/) as its Markdown parser by default. |
|---|
| | | |
|---|
| | | {{% alert title="Tip" %}} |
|---|
| | | If you've been using earlier versions of Hugo, you may need to make some small changes to your site to work with the current Markdown parser. In particular, if you cloned an earlier version of our example site, add the following to your `config.toml` to allow Goldmark to render raw HTML as well as Markdown: |
|---|
| | | |
|---|
| | | ```toml |
|---|
| | | [markup] |
|---|
| | | [markup.goldmark] |
|---|
| | | [markup.goldmark.renderer] |
|---|
| | | unsafe = true |
|---|
| | | ``` |
|---|
| | | |
|---|
| | | Alternatively, if you want to continue using Blackfriday, you can follow the instructions in the [Hugo documentation](https://gohugo.io/getting-started/configuration-markup#blackfriday) to change the Markdown parser. |
|---|
| | | {{% /alert %}} |
|---|
| | | |
|---|
| | | In addition to your marked-up text, you can also use Hugo and Docsy's [shortcodes](/docs/adding-content/shortcodes): reusable chunks of HTML that you can use to quickly build your pages. Find out more about shortcodes in [Docsy Shortcodes](/docs/adding-content/shortcodes). |
|---|
| | | |
|---|
| | | {{% alert title="Note" color="info" %}} |
|---|
| | | Hugo also supports adding content using other markups using [external parsers as helpers](https://gohugo.io/content-management/formats/#additional-formats-through-external-helpers). For example, you can add content in RST using `rst2html` as an external parser (though be aware this does not support all flavors of RST, such as Sphinx RST). Similarly, you can use `asciidoctor` to parse Asciidoc files, or `pandoc` for other formats. |
|---|
| | | |
|---|
| | | External parsers may not be suitable for use with all deployment options, as you'll need to install the external parser and run Hugo yourself to generate your site (so, for example, you won't be able to use [Netlify's continuous deployment feature](/docs/deployment/#deployment-with-netlify)). In addition, adding an external parser may cause performance issues building larger sites. |
|---|
| | | {{% /alert %}} |
|---|
| | | |
|---|
| | | ### Working with links |
|---|
| | | |
|---|
| | | Hugo lets you specify links using normal Markdown syntax, though remember that you need to specify links relative to your site's root URL, and that relative URLs are left unchanged by Hugo in your site's generated HTML. |
|---|
| | | |
|---|
| | | Alternatively you can use Hugo's helper [`ref` and `relref` shortcodes](https://gohugo.io/content-management/cross-references/) for creating internal links that resolve to the correct URL. However, be aware this means your links will not appear as links at all if a user views your page outside your generated site, for example using the rendered Markdown feature in GitHub's web UI. |
|---|
| | | |
|---|
| | | You can find (or add!) tips and gotchas for working with Hugo links in [Hugo Tips](/docs/best-practices/site-guidance). |
|---|
| | | |
|---|
| | | ### Content style |
|---|
| | | |
|---|
| | | We don't mandate any particular style for your page contents. However, if you'd like some guidance on how to write and format clear, concise technical documentation, we recommend the [Google Developer Documentation Style Guide](https://developers.google.com/style/), particularly the [Style Guide Highlights](https://developers.google.com/style/highlights). |
|---|
| | | |
|---|
| | | ## Page bundles |
|---|
| | | |
|---|
| | | You can create site pages as standalone files in their section or subsection directory, or as folders where the content is in the folder's index page. Creating a folder for your page lets you [bundle](https://gohugo.io/content-management/page-bundles/) images and other resources together with the content. |
|---|
| | | |
|---|
| | | |
|---|
| | | You can find out much more about managing resources with Hugo bundles in [Page Bundles](https://gohugo.io/content-management/page-bundles/). |
|---|
| | | |
|---|
| | | ### Organizing your documentation |
|---|
| | | |
|---|
| | | While Docsy's top-level sections let you create site sections for different types of content, you may also want to organize your docs content within your `docs` section. For example, this site's `docs` section directory has multiple subdirectories for **Getting Started**, **Content and Customization**, and so on. Each subdirectory has an `_index.md` (it could also be an `_index.html`), which acts as a section index page and tells Hugo that the relevant directory is a subsection of your docs. |
|---|
| | | |
|---|
| | | #### Docs section landing pages |
|---|
| | | |
|---|
| | | By default a docs section landing page (the `_index.md` or `_index.html` in the section directory) uses a layout that adds a formatted list of links to the pages in the section, with their frontmatter descriptions. The [Content and Customization](/docs/adding-content/) landing page in this site is a good example. |
|---|
| | | |
|---|
| | | To display a simple bulleted list of links to the section's pages instead, specify `simple_list: true` in the landing page's frontmatter: |
|---|
| | | |
|---|
| | | ``` |
|---|
| | | --- |
|---|
| | | title: "Simple List Page" |
|---|
| | | simple_list: true |
|---|
| | | weight: 20 |
|---|
| | | --- |
|---|
| | | ``` |
|---|
| | | |
|---|
| | | To display no links at all, specify `no_list: true` in the landing page's frontmatter: |
|---|
| | | |
|---|
| | | ``` |
|---|
| | | --- |
|---|
| | | title: "No List Page" |
|---|
| | | no_list: true |
|---|
| | | weight: 20 |
|---|
| | | --- |
|---|
| | | ``` |
|---|
| | | |
|---|
| | | ### Building your own landing pages |
|---|
| | | |
|---|
| | | If you've just used the theme, you can still use all Docsy's provided [page blocks](/docs/adding-content/shortcodes) (or any other content you want) to build your own landing pages in the same file locations. |
|---|
| New file |
| | |
|---|
| | | --- |
|---|
| | | title: "Logos and Images" |
|---|
| | | weight: 5 |
|---|
| | | description: > |
|---|
| | | Add and customize logos, icons, and images in your project. |
|---|
| | | --- |
|---|
| | | |
|---|
| | | ## Add your logo |
|---|
| | | |
|---|
| | | Add your project logo as `assets/icons/logo.svg` in your project. This overrides the default Docsy logo in the theme. If you don't want a project logo, set `navbar_logo` to `false` (or delete the variable) in your `config.toml`: |
|---|
| | | |
|---|
| | | ``` |
|---|
| | | navbar_logo = false |
|---|
| | | ``` |
|---|
| | | |
|---|
| | | If you decide at a later stage that you'd like to add a logo to your navbar, you can set the parameter to `true`: |
|---|
| | | |
|---|
| | | ``` |
|---|
| | | navbar_logo = true |
|---|
| | | ``` |
|---|
| | | |
|---|
| | | {{% alert title="Tip" %}} |
|---|
| | | Your logo is included in the default Docsy navbar as an inline SVG with the following CSS styling (from [`_nav.scss`](https://github.com/google/docsy/blob/master/assets/scss/_nav.scss)): |
|---|
| | | |
|---|
| | | ``` |
|---|
| | | svg { |
|---|
| | | display: inline-block; |
|---|
| | | margin: 0 10px; |
|---|
| | | height: 30px; |
|---|
| | | } |
|---|
| | | ``` |
|---|
| | | |
|---|
| | | To ensure your logo displays correctly, you may want to resize it, ensure it doesn't have height and width attributes so that its size is fully responsive, or override the default styling with your own CSS. |
|---|
| | | {{% /alert %}} |
|---|
| | | |
|---|
| | | ## Add your favicons |
|---|
| | | |
|---|
| | | The easiest way to do this is to create a set of favicons via http://cthedot.de/icongen (which lets you create a huge range of icon sizes and options from a single image) and/or https://favicon.io/, and put them in your site project's `static/favicons` directory. This will override the default favicons from the theme. |
|---|
| | | |
|---|
| | | Note that https://favicon.io/ doesn't create as wide a range of sizes as Icongen but *does* let you quickly create favicons from text: if you want to create text favicons you can use this site to generate them, then use Icongen to create more sizes (if necessary) from your generated `.png` file. |
|---|
| | | |
|---|
| | | If you have special favicon requirements, you can create your own `layouts/partials/favicons.html` with your links. |
|---|
| | | |
|---|
| | | ## Add images |
|---|
| | | |
|---|
| | | ### Landing pages |
|---|
| | | |
|---|
| | | Docsy's [`blocks/cover` shortcode](/docs/adding-content/shortcodes/#blocks-cover) make it easy to add large cover images to your landing pages. The shortcode looks for an image with the word "background" in the name inside the landing page's [Page Bundle](https://gohugo.io/content-management/page-bundles/) - so, for example, if you've copied the example site, the landing page image in `content/en/_index.html` is `content/en/featured-background.jpg`. |
|---|
| | | |
|---|
| | | You specify the preferred display height of a cover block container (and hence its image) using the block's `height` parameter. For a full viewport height, use `full`: |
|---|
| | | |
|---|
| | | For a shorter image, as in the example site's About page, use one of `min`, `med`, `max` or `auto` (the actual height of the image): |
|---|
| | | |
|---|
| | | |
|---|
| | | ### Other pages |
|---|
| | | |
|---|
| | | To add inline images to other pages, use the [`imgproc` shortcode](/docs/adding-content/shortcodes/#imgproc). Alternatively, if you prefer, just use regular Markdown or HTML images and add your image files to your project's `static` directory. You can find out more about using this directory in [Adding static content](/docs/adding-content/content/#adding-static-content). |
|---|
| | | |
|---|
| | | ## Images used on this site |
|---|
| | | |
|---|
| | | Images used as background images in this site are in the [public domain](https://commons.wikimedia.org/wiki/User:Bep/gallery#Wed_Aug_01_16:16:51_CEST_2018) and can be used freely. The porridge image in the example site is by <a href="https://pixabay.com/users/iha31-560629/?utm_source=link-attribution&utm_medium=referral&utm_campaign=image&utm_content=531209">iha31</a> from <a href="https://pixabay.com/?utm_source=link-attribution&utm_medium=referral&utm_campaign=image&utm_content=531209">Pixabay</a> |
|---|
| | | |
|---|
| New file |
| | |
|---|
| | | --- |
|---|
| | | title: "Navigation and Search" |
|---|
| | | weight: 6 |
|---|
| | | description: > |
|---|
| | | Customize site navigation and search for your Docsy site. |
|---|
| | | --- |
|---|
| | | |
|---|
| | | ## Top-level menu |
|---|
| | | |
|---|
| | | The top level menu (the one that appears in the top navigation bar for the entire site) uses your site's [`main` menu](https://gohugo.io/content-management/menus/). All Hugo sites have a `main` menu array of menu entries, accessible via the `.Site.Menus` site variable and populatable via page front matter or your site's `config.toml`. |
|---|
| | | |
|---|
| | | To add a page or section to this menu, add it to the site's `main` menu in either `config.toml` or in the destination page's front matter (in `_index.md` or `_index.html` for a section, as that's the section landing page). For example, here's how we added the Documentation section landing page to the main menu in this site: |
|---|
| | | |
|---|
| | | ```yaml |
|---|
| | | --- |
|---|
| | | title: "Docsy Documentation" |
|---|
| | | linkTitle: "Documentation" |
|---|
| | | menu: |
|---|
| | | main: |
|---|
| | | weight: 20 |
|---|
| | | --- |
|---|
| | | ``` |
|---|
| | | |
|---|
| | | The menu is ordered from left to right by page `weight`. So, for example, a section index or page with `weight: 30` would appear after the Documentation section in the menu, while one with `weight: 10` would appear before it. |
|---|
| | | |
|---|
| | | If you want to add a link to an external site to this menu, add it in `config.toml`, specifying the `weight`. |
|---|
| | | |
|---|
| | | ```yaml |
|---|
| | | [[menu.main]] |
|---|
| | | name = "GitHub" |
|---|
| | | weight = 50 |
|---|
| | | url = "https://github.com/google/docsy/" |
|---|
| | | ``` |
|---|
| | | |
|---|
| | | ### Adding a version drop-down |
|---|
| | | |
|---|
| | | Depending on your project's releases and versioning, you may want to let your users access "old" versions of your site (how you deploy your archived sites is up to you) to read about previous versions of your project. |
|---|
| | | |
|---|
| | | If you add some `[params.versions]` in `config.toml`, the Docsy theme adds a version selector drop down to the top-level menu. You specify a URL and a name for each version you would like to add to the menu, as in the following example: |
|---|
| | | |
|---|
| | | ``` |
|---|
| | | # Add your release versions here |
|---|
| | | [[params.versions]] |
|---|
| | | version = "master" |
|---|
| | | url = "https://master.kubeflow.org" |
|---|
| | | |
|---|
| | | [[params.versions]] |
|---|
| | | version = "v0.2" |
|---|
| | | url = "https://v0-2.kubeflow.org" |
|---|
| | | |
|---|
| | | [[params.versions]] |
|---|
| | | version = "v0.3" |
|---|
| | | url = "https://v0-3.kubeflow.org" |
|---|
| | | ``` |
|---|
| | | |
|---|
| | | (don't forget to add your current version so users can navigate back!) |
|---|
| | | |
|---|
| | | The default version drop-down menu title is `Releases`. To change this, change the `version_menu` parameter in `config.toml`: |
|---|
| | | |
|---|
| | | ``` |
|---|
| | | version_menu = "Releases" |
|---|
| | | ``` |
|---|
| | | |
|---|
| | | ## Section menu |
|---|
| | | |
|---|
| | | The section menu, as shown in the left side of the `docs` section, is automatically built from the `content` tree. Like the top-level menu, it is ordered by page or section index `weight` (or by page creation `date` if `weight` is not set), with the page or index's `Title`, or `linkTitle` if different, as its link title in the menu. If a section subfolder has pages other than `_index.md` or `_index.html`, those pages will appear as a submenu, again ordered by `weight`. For example, here's the metadata for this page showing its `weight` and `title`: |
|---|
| | | |
|---|
| | | ```yaml |
|---|
| | | --- |
|---|
| | | title: "Navigation and Search" |
|---|
| | | linkTitle: "Navigation and Search" |
|---|
| | | date: 2017-01-05 |
|---|
| | | weight: 3 |
|---|
| | | description: > |
|---|
| | | Customize site navigation and search for your Docsy site. |
|---|
| | | --- |
|---|
| | | ``` |
|---|
| | | |
|---|
| | | To hide a page or section from the menu, set `toc_hide: true` in front matter. |
|---|
| | | |
|---|
| | | By default, the section menu will show the current section fully expanded all the way down. This may make the left nav too long and difficult to scan for bigger sites. Try setting site param `ui.sidebar_menu_compact = true` in `config.toml`. |
|---|
| | | |
|---|
| | | ## Breadcrumb navigation |
|---|
| | | |
|---|
| | | Breadcrumb navigation is enabled by default. To disable breadcrumb navigation, set site param `ui.breadcrumb_disable = true` in `config.toml`. |
|---|
| | | |
|---|
| | | ## Site search options |
|---|
| | | |
|---|
| | | Docsy offers multiple options that let your readers search your site content, so you can pick one that suits your needs. You can choose from: |
|---|
| | | |
|---|
| | | * [Local search with Lunr](#configure-local-search-with-lunr), which uses Javascript to index and search your site without the need to connect to external services. This option doesn't require your site to be public. |
|---|
| | | |
|---|
| | | If you enable any of these search options in your `config.toml`, a search box displays in the right of your top navigation bar. By default a search box also displays at the top of the section menu in the left navigation pane, which you can disable if you prefer, or if you're using a search option that only works with the top search box. |
|---|
| | | |
|---|
| | | Be aware that if you accidentally enable more than one search option in your `config.toml` you may get unexpected results (for example, if you have added the `.js` for Algolia DocSearch, you'll get Algolia results if you enable GCSE search but forget to disable Algolia search). |
|---|
| | | |
|---|
| | | ### Disabling the sidebar search box |
|---|
| | | |
|---|
| | | By default, the search box appears in both the top navigation bar and at the top of the sidebar left navigation pane. If you don't want the sidebar search box, set `sidebar_search_disable` to `true` in `config.toml`: |
|---|
| | | |
|---|
| | | ``` |
|---|
| | | sidebar_search_disable = true |
|---|
| | | ``` |
|---|
| | | |
|---|
| | | ### Setting up site search |
|---|
| | | |
|---|
| | | 1. Deploy your site and ensure that it's built with `HUGO_ENV="production"`, as Google will only crawl and index Docsy sites built with this setting (you probably don't want your not-ready-for-prime-time site to be searchable!). You can specify this variable as a command line flag to Hugo: |
|---|
| | | |
|---|
| | | ``` |
|---|
| | | $ env HUGO_ENV="production" hugo |
|---|
| | | ``` |
|---|
| | | |
|---|
| | | Alternatively, if you're using Netlify, you can specify it as a Netlify [deployment setting](https://www.netlify.com/docs/continuous-deployment/#build-environment-variables) in `netlify.toml` or the Netlify UI, along with the Hugo version. It may take a day or so before your site has actual search results available. |
|---|
| | | 3. Add any further configuration you want to your search engine using the **Edit search engine** options. In particular you may want to do the following: |
|---|
| | | |
|---|
| | | * Select **Look and feel**. Change from the default **Overlay** layout to **Results only**, as this option means your search results are embedded in your search page rather than appearing in a separate box. Click **Save** to save your changes. |
|---|
| | | * Edit the default result link behavior so that search results from your site don't open in a new tab. To do this, select **Search Features** - **Advanced** - **Websearch Settings**. In the **Link Target** field, type "\_parent". Click **Save** to save your changes. |
|---|
| | | |
|---|
| | | {{% alert title="Tip" %}} |
|---|
| | | Your site search results should show up within a couple of days. If it takes longer than that, you can manually request that your site is indexed by [submitting a sitemap through the Google Search Console](https://support.google.com/webmasters/answer/183668?hl=en). |
|---|
| | | {{% /alert %}} |
|---|
| | | |
|---|
| | | ### Adding the search page |
|---|
| | | |
|---|
| | | Once you have your search engine set up, you can add the feature to your site: |
|---|
| | | |
|---|
| | | 1. Ensure you have a Markdown file in `content/en/search.md` (and one per other languages if needed) to display your search results. It only needs a title and `layout: search`, as in the following example: |
|---|
| | | |
|---|
| | | ``` |
|---|
| | | --- |
|---|
| | | title: Search Results |
|---|
| | | layout: search |
|---|
| | | --- |
|---|
| | | ``` |
|---|
| | | |
|---|
| | | 1. Add your Google Custom Search Engine ID to the site params in `config.toml`. You can add different values per language if needed. |
|---|
| | | |
|---|
| | | ``` |
|---|
| | | # Google Custom Search Engine ID. Remove or comment out to disable search. |
|---|
| | | gcs_engine_id = "011737558837375720776:fsdu1nryfng" |
|---|
| | | ``` |
|---|
| | | |
|---|
| | | ## Configure local search with Lunr |
|---|
| | | |
|---|
| | | [Lunr](https://lunrjs.com/) is a Javascript-based search option that lets you index your site and make it searchable without the need for external, server-side search services. This is a good option particularly for smaller or non-public sites. |
|---|
| | | |
|---|
| | | To add Lunr search to your Docsy site: |
|---|
| | | |
|---|
| | | 1. Enable local search in `config.toml`. |
|---|
| | | |
|---|
| | | ``` |
|---|
| | | # Enable local search |
|---|
| | | offlineSearch = true |
|---|
| | | ``` |
|---|
| | | |
|---|
| | | |
|---|
| | | Once you've completed these steps, local search is enabled for your site and results appear in a drop down when you use the search box. |
|---|
| | | |
|---|
| | | {{% alert title="Tip" %}} |
|---|
| | | If you're [testing this locally](/docs/deployment/#serving-your-site-locally) using Hugo’s local server functionality, you need to build your `offline-search-index.xxx.json` file first by running `hugo`. If you have the Hugo server running while you build `offline-search-index.xxx.json`, you may need to stop the server and restart it in order to see your search results. |
|---|
| | | {{% /alert %}} |
|---|
| New file |
| | |
|---|
| | | --- |
|---|
| | | title: "Shortcodes" |
|---|
| | | weight: 7 |
|---|
| | | description: > |
|---|
| | | Use hugo shortcodes to quickly compose site pages. |
|---|
| | | resources: |
|---|
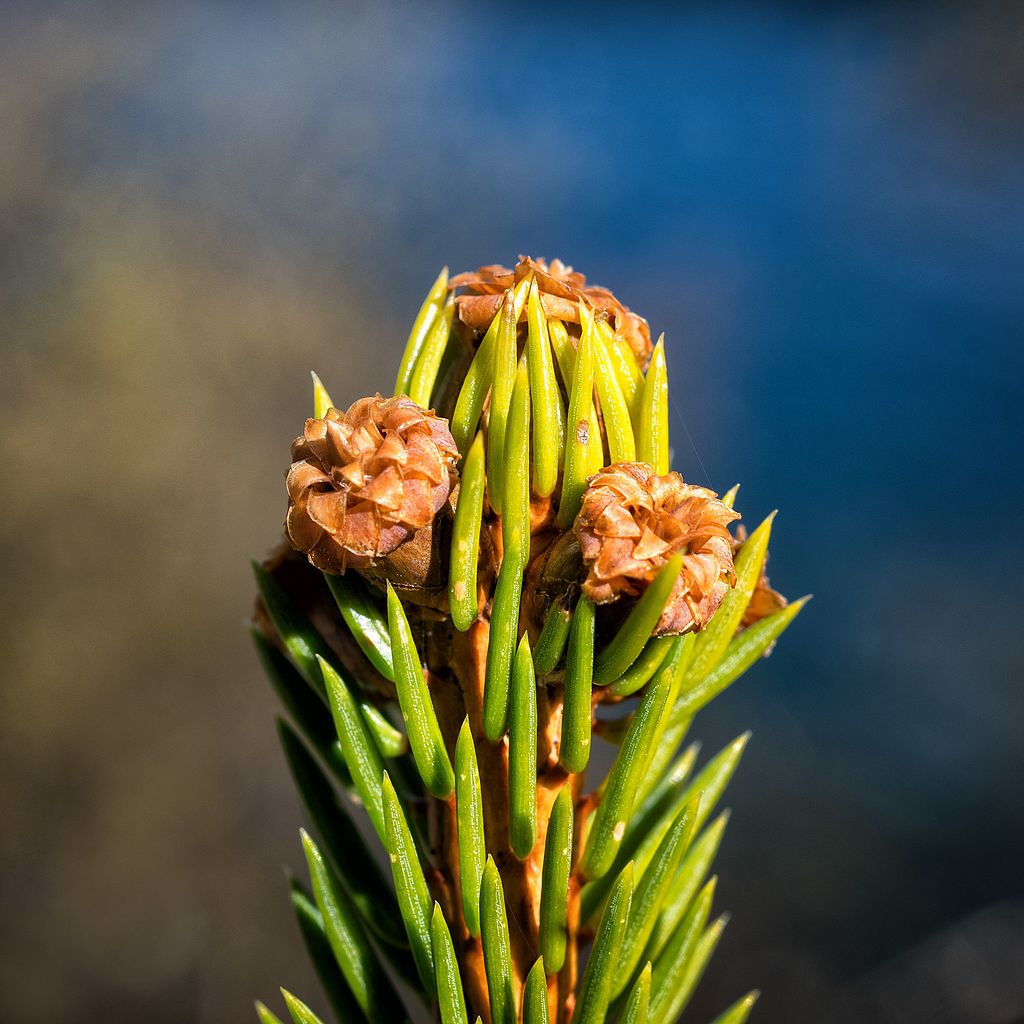
| | | - src: "**spruce*.jpg" |
|---|
| | | params: |
|---|
| | | byline: "Photo: Bjørn Erik Pedersen / CC-BY-SA" |
|---|
| | | --- |
|---|
| | | |
|---|
| | | Rather than writing all your site pages from scratch, Hugo lets you define and use [shortcodes](https://gohugo.io/content-management/shortcodes/). These are reusable snippets of content that you can include in your pages, often using HTML to create effects that are difficult or impossible to do in simple Markdown. Shortcodes can also have parameters that let you, for example, add your own text to a fancy shortcode text box. As well as Hugo's [built-in shortcodes](https://gohugo.io/content-management/shortcodes/), Compose provides some shortcodes of its own to help you build your pages. |
|---|
| | | |
|---|
| | | Why shortcodes? While markdown is sufficient to produce simple pages, it's insufficient where complex page structures are needed. Thusly, whenever we need special styling, shortcodes compliment the shortcomings of markdown. |
|---|
| | | |
|---|
| | | Shortcodes use either `` or `` as the *opening tags*. The former are used if the immediate content is markdown, while the latter is used whenever the immediate content is something else. |
|---|
| | | |
|---|
| | | Sometimes, the shortcode will wrap content, sometimes it won't. When content is wrapped, a closing shortcode tag is needed. Please see the link I provided above and the markdown files for examples. You'll get the gist pretty quickly. |
|---|
| | | |
|---|
| | | I've setup the following shortcodes: |
|---|
| | | |
|---|
| | | ### Block |
|---|
| | | |
|---|
| | | Takes positional modifiers |
|---|
| | | |
|---|
| | | **Example** |
|---|
| | | ```markdown |
|---|
| | | ... |
|---|
| | | {{</* block "modifiers" */>}} |
|---|
| | | <!-- Nest columns or content --> |
|---|
| | | {{</* /block */>}} |
|---|
| | | ... |
|---|
| | | ``` |
|---|
| | | |
|---|
| | | ### Column |
|---|
| | | |
|---|
| | | It takes positional parameters |
|---|
| | | |
|---|
| | | **Example** |
|---|
| | | ```markdown |
|---|
| | | {{</* column "mt-2 mb-2" */>}} |
|---|
| | | <!-- applied margin top and margin bottom modifiers --> |
|---|
| | | {{</* /column */>}} |
|---|
| | | ``` |
|---|
| | | |
|---|
| | | ### Video |
|---|
| | | |
|---|
| | | This allows you to embed a youtube video in you content. You would achieve that using a positional parameter (needs no name )parameter, like so: |
|---|
| | | |
|---|
| | | **Example:** |
|---|
| | | |
|---|
| | | ```markdown |
|---|
| | | {{</* youtube "xWF59rWSceA" */>}} |
|---|
| | | <!-- Use the youtube video id --> |
|---|
| | | ``` |
|---|
| | | |
|---|
| | | ### Button |
|---|
| | | |
|---|
| | | This adds a styled link (styled like a button). It takes two no-optional parameters: |
|---|
| | | |
|---|
| | | | PARAMETER | PURPOSE | OPTIONAL | |
|---|
| | | | :--- | :--- | :--- | |
|---|
| | | | label | button text | no | |
|---|
| | | | url | button link | no | |
|---|
| | | |
|---|
| | | **Example** |
|---|
| | | |
|---|
| | | ``` |
|---|
| | | {{</* button url="/" label="doe nu mee" */>}} |
|---|
| | | ``` |
|---|
| New file |
| | |
|---|
| | | --- |
|---|
| | | title: "Getting Started" |
|---|
| | | weight: 2 |
|---|
| | | description: > |
|---|
| | | This page tells you how to get started with the Docsy theme, including installation and basic configuration. |
|---|
| | | --- |
|---|
| | | |
|---|
| | | ## Prerequisites and installation |
|---|
| | | |
|---|
| | | ### Install Hugo |
|---|
| | | |
|---|
| | | You need a [recent **extended** version](https://github.com/gohugoio/hugo/releases) (we recommend version 0.53 or later) of [Hugo](https://gohugo.io/) to do local builds and previews of sites (like this one) that use Docsy. If you install from the release page, make sure to get the `extended` Hugo version, which supports [SCSS](https://sass-lang.com/documentation/file.SCSS_FOR_SASS_USERS.html); you may need to scroll down the list of releases to see it. |
|---|
| | | |
|---|
| | | For comprehensive Hugo documentation, see [gohugo.io](https://gohugo.io/). |
|---|
| | | |
|---|
| | | #### Linux |
|---|
| | | |
|---|
| | | Do **not** use `sudo apt-get install hugo`, as it currently doesn't get you the `extended` version. |
|---|
| | | |
|---|
| | | If you've already installed Hugo, check your version: |
|---|
| | | |
|---|
| | | ``` |
|---|
| | | hugo version |
|---|
| | | ``` |
|---|
| | | |
|---|
| | | If the result is `v0.52` or earlier, or if you don't see `Extended`, you'll need to install the latest version. |
|---|
| | | |
|---|
| | | 1. Go to the [Hugo releases](https://github.com/gohugoio/hugo/releases) page. |
|---|
| | | 2. In the most recent release, scroll down until you find a list of |
|---|
| | | **Extended** versions. |
|---|
| | | 3. Download the latest extended version (`hugo_extended_0.5X_Linux-64bit.tar.gz`). |
|---|
| | | 4. Create a new directory: |
|---|
| | | mkdir hugo |
|---|
| | | 5. Extract the files you downloaded to `hugo`. |
|---|
| | | 6. Switch to your new directory: |
|---|
| | | cd hugo |
|---|
| | | 7. Install Hugo: |
|---|
| | | sudo install hugo /usr/bin |
|---|
| | | |
|---|
| | | #### macOS |
|---|
| | | |
|---|
| | | Install Hugo using [Brew](https://gohugo.io/getting-started/installing/#homebrew-macos). |
|---|
| | | |
|---|
| | | ### Install PostCSS |
|---|
| | | |
|---|
| | | To build or update your site's CSS resources, you also need [`PostCSS`](https://postcss.org/) to create the final assets. If you need to install it, you must have a recent version of [NodeJS](https://nodejs.org/en/) installed on your machine so you can use `npm`, the Node package manager. By default `npm` installs tools under the directory where you run `npm install`: |
|---|
| | | |
|---|
| | | ``` |
|---|
| | | sudo npm install -D --save autoprefixer |
|---|
| | | sudo npm install -D --save postcss-cli |
|---|
| | | ``` |
|---|
| | | |
|---|
| | | Note that versions of `PostCSS` later than 5.0.1 will not load `autoprefixer` if installed [globally](https://flaviocopes.com/npm-packages-local-global/), you must use a local install. |
|---|
| | | |
|---|
| | | ## Using the theme |
|---|
| | | |
|---|
| | | To use the Docsy Hugo theme, you have a couple of options: |
|---|
| | | |
|---|
| | | * **Copy and edit the source for the [Docsy example site](https://github.com/google/docsy-example).** This approach gives you a skeleton structure for your site, with top-level and documentation sections and templates that you can modify as necessary. The example site uses Docsy as a [Git submodule](https://git-scm.com/book/en/v2/Git-Tools-Submodules), so it's easy to [keep up to date](#keeping-the-theme-up-to-date). |
|---|
| | | * **Build your own site using the Docsy theme.** Specify the [Docsy theme](https://github.com/google/docsy) like any other [Hugo theme](https://gohugo.io/themes/) when creating or updating your site. With this option, you'll get Docsy look and feel, navigation, and other features, but you'll need to specify your own site structure. |
|---|
| | | |
|---|
| | | ### Option 1: Clone the Docsy example site |
|---|
| | | |
|---|
| | | The [Example Site](https://example.docsy.dev) gives you a good starting point for building your docs site and is |
|---|
| | | pre-configured to use the Docsy theme as a Git submodule. You can clone the Example Site either by: |
|---|
| | | |
|---|
| | | * [Using the GitHub UI](#using-the-github-ui) |
|---|
| | | * [Using the command line](#using-the-command-line) |
|---|
| | | |
|---|
| | | #### Using the command line |
|---|
| | | |
|---|
| | | To copy the example site: |
|---|
| | | |
|---|
| | | 1. Make a local working copy of the example site directly using `git clone`: |
|---|
| | | git clone https://github.com/google/docsy-example.git |
|---|
| | | 1. Switch to the root of the cloned project, for example: |
|---|
| | | cd docsy-example |
|---|
| | | 1. Get local copies of the project submodules so you can build and run your site locally: |
|---|
| | | git submodule update --init --recursive |
|---|
| | | 1. Build your site: |
|---|
| | | hugo server |
|---|
| | | 1. Preview your site in your browser at: http://localhost:1313/. You can use `Ctrl + c` to stop the Hugo server whenever you like. |
|---|
| | | |
|---|
| | | 1. Now that you have a site running, you can push it to a new repository: |
|---|
| | | |
|---|
| | | 1. [Create a new repository in GitHub](https://help.github.com/en/articles/create-a-repo) |
|---|
| | | for your site with your chosen repo name. For clarity you may also want to rename the root |
|---|
| | | directory (`docsy-example`) of your working copy to match, though everything will still |
|---|
| | | work even if you don't. |
|---|
| | | |
|---|
| | | 1. Configure |
|---|
| | | [`origin`](https://help.github.com/en/articles/configuring-a-remote-for-a-fork) |
|---|
| | | in your project. From your site's root directory, set the URL for `origin` to your new |
|---|
| | | repo (otherwise you'll be trying to push changes to `google/docsy` rather than to your repo): |
|---|
| | | |
|---|
| | | git remote set-url origin https://github.com/MY-SITE/EXAMPLE.git |
|---|
| | | |
|---|
| | | |
|---|
| | | 1. Verify that your remote is configured correctly by running: |
|---|
| | | git remote -v |
|---|
| | | 1. Push your Docsy site to your repository: |
|---|
| | | git push -u origin master |
|---|
| | | |
|---|
| | | ### Option 2: Use the Docsy theme in your own site |
|---|
| | | |
|---|
| | | Specify the [Docsy theme](https://github.com/google/docsy) like any other Hugo theme when creating or updating your site. This gives you all the theme-y goodness but you'll need to specify your own site structure. You can either use the theme as a submodule (our recommended approach for easy updates), or just clone the theme into your project's `themes` subdirectory. |
|---|
| | | |
|---|
| | | Whichever approach you use, for simplicity we recommend copying and editing our [example site configuration](#configuring-your-site) for your project, or you may get Hugo errors for missing parameters and values when you try to build your site. |
|---|
| | | |
|---|
| | | #### Using the Docsy theme as a submodule |
|---|
| | | |
|---|
| | | Adding Docsy as a Git submodule is our recommended approach for using the theme, as it means your project |
|---|
| | | always refers to the Docsy repo version at your chosen revision, rather than you having your own copy in |
|---|
| | | your repo that may result in merge conflicts when you try to update it. This is the approach used by our |
|---|
| | | [example project](https://github.com/google/docsy-example). |
|---|
| | | |
|---|
| | | |
|---|
| | | To create a new Hugo site project and then add the Docs theme as a submodule, run the following commands from your project's root directory. |
|---|
| | | |
|---|
| | | ```shell |
|---|
| | | hugo new site myproject |
|---|
| | | cd myproject |
|---|
| | | git init |
|---|
| | | git submodule add https://github.com/google/docsy.git themes/docsy |
|---|
| | | echo 'theme = "docsy"' >> config.toml |
|---|
| | | git submodule update --init --recursive |
|---|
| | | ``` |
|---|
| | | |
|---|
| | | To add the Docsy theme to an existing site, run the following commands from your project's root directory: |
|---|
| | | |
|---|
| | | ``` |
|---|
| | | git submodule add https://github.com/google/docsy.git themes/docsy |
|---|
| | | echo 'theme = "docsy"' >> config.toml |
|---|
| | | git submodule update --init --recursive |
|---|
| | | ``` |
|---|
| | | |
|---|
| | | #### Cloning the Docsy theme to your project's `themes` subdirectory |
|---|
| | | |
|---|
| | | If you don't want to use a submodules (for example, if you want to customize and maintain your own copy of the theme directly, or your deployment choice requires you to include a copy of the theme in your repository), you can clone the theme into your project. |
|---|
| | | |
|---|
| | | To clone Docsy into your project's `theme` folder, run the following commands from your project's root directory: |
|---|
| | | |
|---|
| | | ``` |
|---|
| | | cd themes |
|---|
| | | git clone https://github.com/google/docsy |
|---|
| | | ``` |
|---|
| | | |
|---|
| | | For more information, see [Install and Use Themes](https://gohugo.io/themes/installing-and-using-themes/#install-a-single-theme) on the [Hugo](https://gohugo.io) site. |
|---|
| | | |
|---|
| | | #### Preview your site |
|---|
| | | |
|---|
| | | To build and preview your site locally: |
|---|
| | | |
|---|
| | | ``` |
|---|
| | | cd myproject |
|---|
| | | hugo server |
|---|
| | | ``` |
|---|
| | | |
|---|
| | | By default, your site will be available at http://localhost:1313/. |
|---|
| | | |
|---|
| | | ## Basic site configuration |
|---|
| | | |
|---|
| | | Site-wide configuration details and parameters are defined in your project's `config.toml` file. These include your chosen Hugo theme (Docsy, of course!), project name, community links, Google Analytics configuration, and Markdown parser parameters. See the examples with comments in [`config.toml` in the example project](https://github.com/google/docsy-example/blob/master/config.toml) for how to add this information. **We recommend copying this `config.toml` and editing it even if you're just using the theme and not copying the entire Docsy example site**. |
|---|
| | | |
|---|
| | | The Docsy example site comes with some defaults you may want to remove or customize straight away: |
|---|
| | | |
|---|
| | | ### Search |
|---|
| | | |
|---|
| | | By default, the Docsy example site uses its own [Google Custom Search Engine](https://cse.google.com/cse/all). To disable site search, delete or comment out the following lines: |
|---|
| | | |
|---|
| | | ``` |
|---|
| | | # Google Custom Search Engine ID. Remove or comment out to disable search. |
|---|
| | | gcs_engine_id = "011737558837375720776:fsdu1nryfng" |
|---|
| | | ``` |
|---|
| | | |
|---|
| | | To use your own Custom Search Engine, replace the value in the `gcs_engine_id` with the ID of your own search engine. |
|---|
| | | |
|---|
| | | ## What's next? |
|---|
| | | |
|---|
| | | * [Add content and customize your site](/docs/adding-content/) |
|---|
| | | * Get some ideas from our [Example Site](https://github.com/google/docsy-example) and other [Examples](/docs/examples/). |
|---|
| | | * [Publish your site](/docs/deployment/). |
|---|
| New file |
| | |
|---|
| | | [build] |
|---|
| | | publish = "public" |
|---|
| | | command = "hugo --gc --minify" |
|---|
| | | |
|---|
| | | [context.production.environment] |
|---|
| | | HUGO_VERSION = "0.64.0" |
|---|
| | | HUGO_ENV = "production" |
|---|
| | | HUGO_ENABLEGITINFO = "true" |
|---|
| | | |
|---|
| | | [context.split1] |
|---|
| | | command = "hugo --gc --minify --enableGitInfo" |
|---|
| | | |
|---|
| | | [context.split1.environment] |
|---|
| | | HUGO_VERSION = "0.64.0" |
|---|
| | | HUGO_ENV = "production" |
|---|
| | | |
|---|
| | | [context.deploy-preview] |
|---|
| | | command = "hugo --gc --minify --buildFuture -b $DEPLOY_PRIME_URL" |
|---|
| | | |
|---|
| | | [context.deploy-preview.environment] |
|---|
| | | HUGO_VERSION = "0.64.0" |
|---|
| | | |
|---|
| | | [context.branch-deploy] |
|---|
| | | command = "hugo --gc --minify -b $DEPLOY_PRIME_URL" |
|---|
| | | |
|---|
| | | [context.branch-deploy.environment] |
|---|
| | | HUGO_VERSION = "0.64.0" |
|---|
| | | |
|---|
| | | [context.next.environment] |
|---|
| | | HUGO_ENABLEGITINFO = "true" |
|---|

